Book resource: Difference between revisions
From MoodleDocs
Mary Cooch (talk | contribs) (updated video for 4.3) |
|||
| (93 intermediate revisions by 15 users not shown) | |||
| Line 1: | Line 1: | ||
{{Resources}} | |||
__NOTOC__ | |||
==What is the Book resource?== | |||
Books allow teachers to create multi-page resources with a book-like format and table of contents. Multimedia may be embedded and books may be printed entirely or by chapter. | |||
{{MediaPlayer | url = https://youtu.be/cXmOaS0B1lg| desc = Overview of the Book resource}} | |||
==How is it set up?== | |||
#In a course, with the editing turned on, choose 'Book' from the activity chooser. | |||
#Give it a name and, if required a description (which will appear on all chapters of the book), checking the box if you want the description displayed on the course page. | |||
#In Appearance, decide on the chapter formatting, and whether you want custom titles. Use the help icon for more information. | |||
#Expand the other settings to configure the resource as you wish, and then click Save and display. | |||
#Add content to your first chapter and save the changes. (Note: Moodle 'chapters' are what some might prefer to call 'pages.' | |||
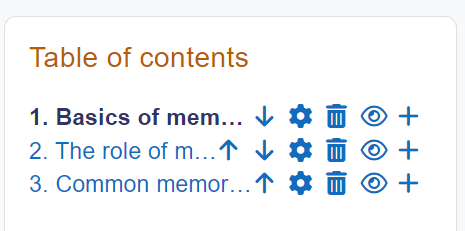
#From the Table of Contents (at the side or underneath the chapter) click the + icon to add another chapter, and repeat the process. | |||
[[File:4toc.png|center]] | |||
'''New in 4.3:''' For usability and accessiblity, the navigation icons float when a page requires scrolling. | |||
[[File:booknavbut.png|center]] | |||
==How does it work?== | |||
===Student view=== | |||
:Students access the book by clicking the icon on the course page. They navigate through the pages either with an arrow, text link or simply via the Table of Contents. | |||
:Images, videos, sound and H5P content may be embedded into book chapters. (Note that embedded H5P content doesn't connect to the gradebook.) | |||
=== | [[File:BookTextLinks.png|center|Book with text navigation and numbered chapters]] | ||
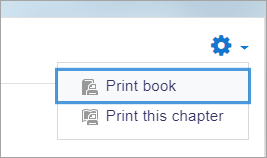
:Students can print books or chapters (as PDF) by clicking the gear icon top right of the book: | |||
[[File:PrintBook.png|center]] | |||
===Teacher view=== | |||
Teachers can edit books from the Table of contents when the editing is turned on. If they hide a page, it is still visible to teachers but students do not see it. | |||
==More information== | |||
* [[Book settings]] | |||
* [[Using Book]] | |||
==See also== | |||
* | *[[Book FAQ]] | ||
*[http://moodle.org/mod/forum/view.php?id=2633 Book forum] on moodle.org | |||
*[http://school.moodledemo.net/mod/book/view.php?id=261 School demo example of a book used for departmental policies.] | |||
* [http://moodle.org/mod/forum/discuss.php?d=76092 Using a Lesson to simulate a Book] forum discussion | |||
* [http://moodle.org/mod/forum/discuss.php?d=207365&parent=910023#p910107 What's the difference between a Book and a Lesson?] | |||
[[Category:Book]] | |||
[[es:Módulo libro]] | |||
[[ | [[eu:Liburua]] | ||
[[ja:ブックモジュール]] | |||
[[de:Buch]] | |||
[[fr:Livre]] | |||
[[ | |||
[[ | |||
[[ | |||
[[ | |||
Latest revision as of 14:46, 17 November 2023
What is the Book resource?
Books allow teachers to create multi-page resources with a book-like format and table of contents. Multimedia may be embedded and books may be printed entirely or by chapter.
How is it set up?
- In a course, with the editing turned on, choose 'Book' from the activity chooser.
- Give it a name and, if required a description (which will appear on all chapters of the book), checking the box if you want the description displayed on the course page.
- In Appearance, decide on the chapter formatting, and whether you want custom titles. Use the help icon for more information.
- Expand the other settings to configure the resource as you wish, and then click Save and display.
- Add content to your first chapter and save the changes. (Note: Moodle 'chapters' are what some might prefer to call 'pages.'
- From the Table of Contents (at the side or underneath the chapter) click the + icon to add another chapter, and repeat the process.
New in 4.3: For usability and accessiblity, the navigation icons float when a page requires scrolling.
How does it work?
Student view
- Students access the book by clicking the icon on the course page. They navigate through the pages either with an arrow, text link or simply via the Table of Contents.
- Images, videos, sound and H5P content may be embedded into book chapters. (Note that embedded H5P content doesn't connect to the gradebook.)
- Students can print books or chapters (as PDF) by clicking the gear icon top right of the book:
Teacher view
Teachers can edit books from the Table of contents when the editing is turned on. If they hide a page, it is still visible to teachers but students do not see it.


